The Philidor and Lucena are two rook endings every player must know.
With 50% of tournament games ending up in rook endgames, it’s important to understand these two rook endings perfectly.
After reading this article, you’ll be able to win these positions when you have the extra pawn. If you’re the defending side, you’ll learn to draw every time.
Let’s get started.
- How to Win the Lucena Rook Ending
- Winning the Lucena Position with an A or H Pawn
- Lucena Practice Scenarios
- How to Draw the Philidor Rook Ending
- How to Win the Phildor Rook Ending (if your opponent makes a mistake)
- What to do when you mess up the Philidor Rook Ending
Table of Contents
How to Win the Lucena Rook Ending
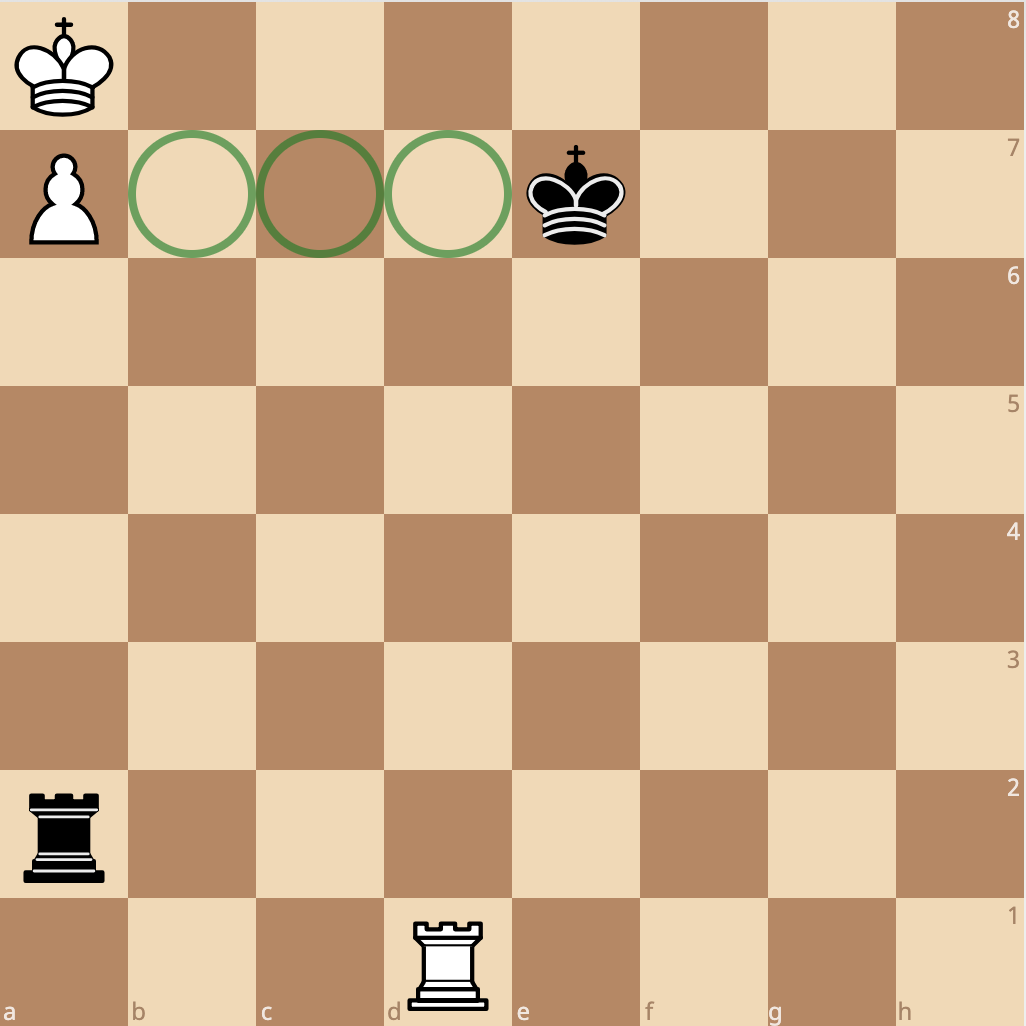
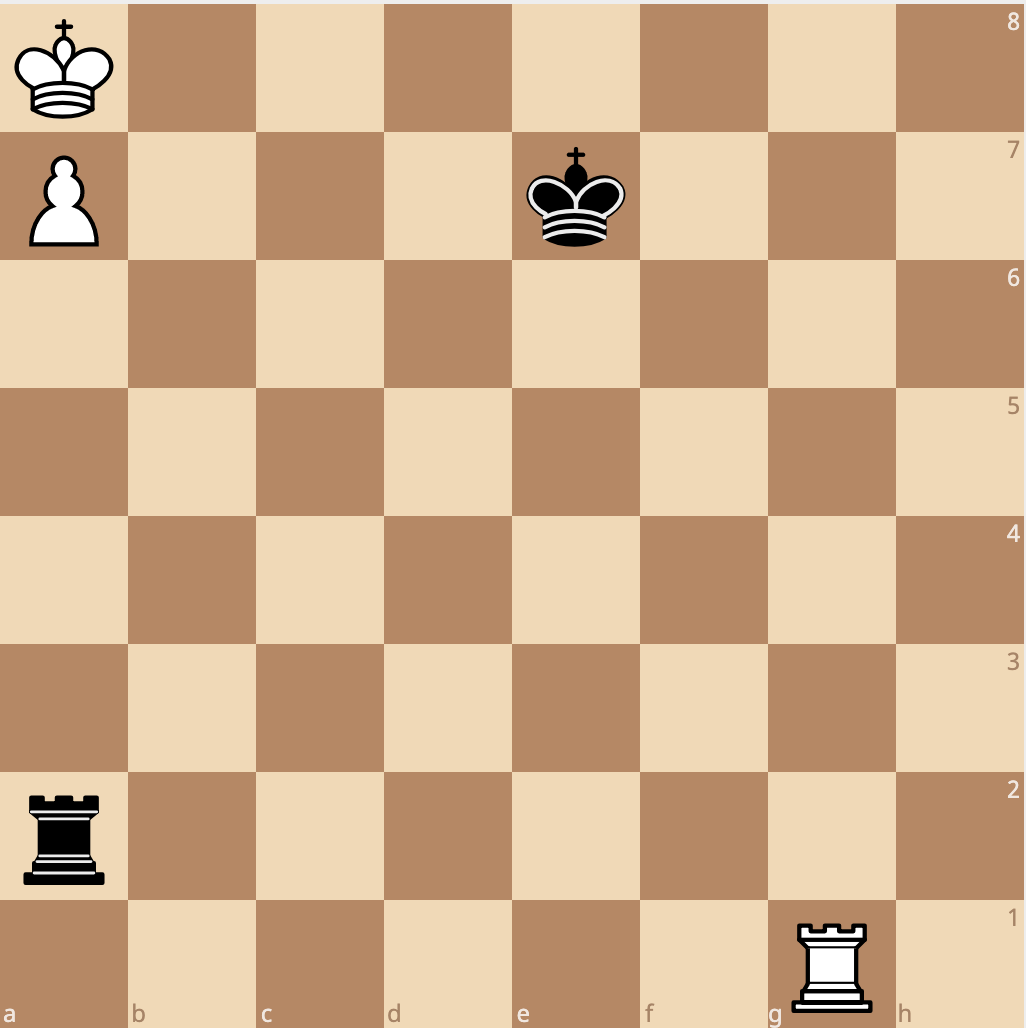
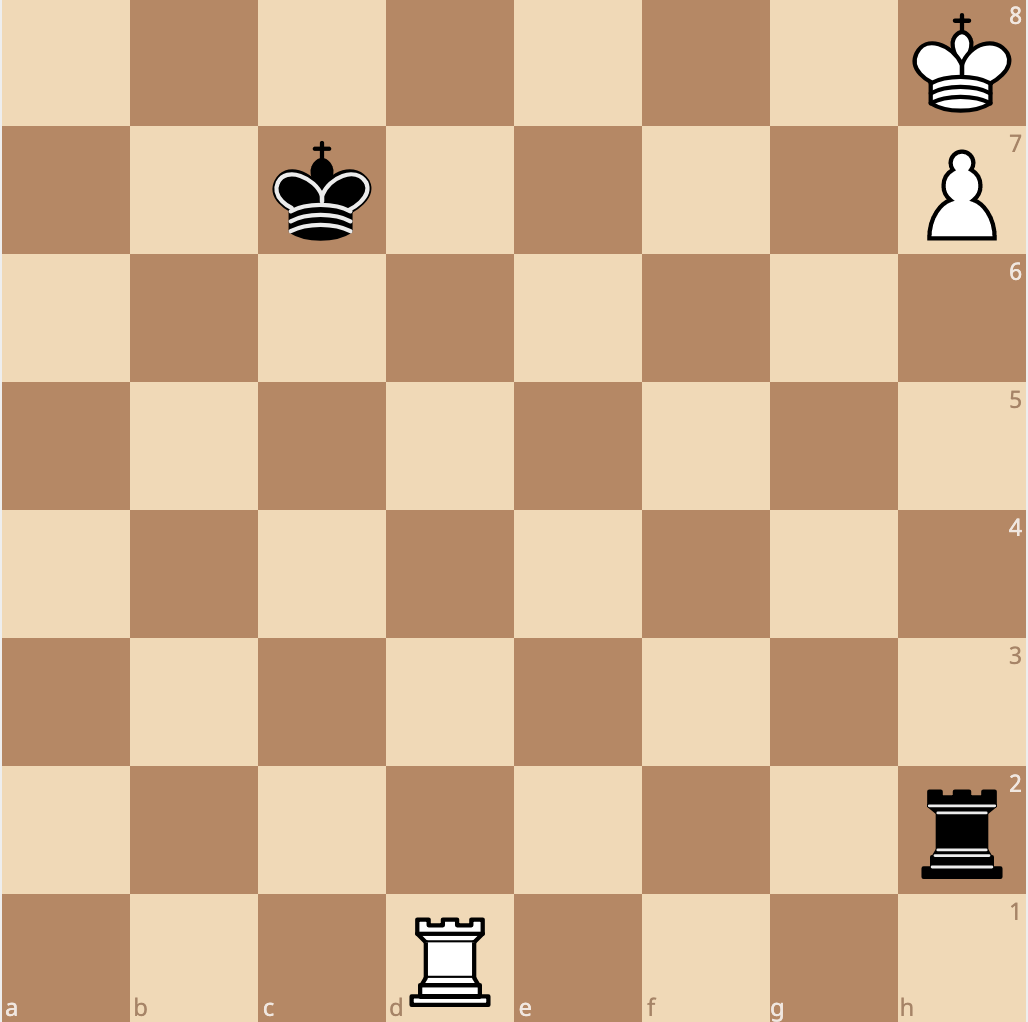
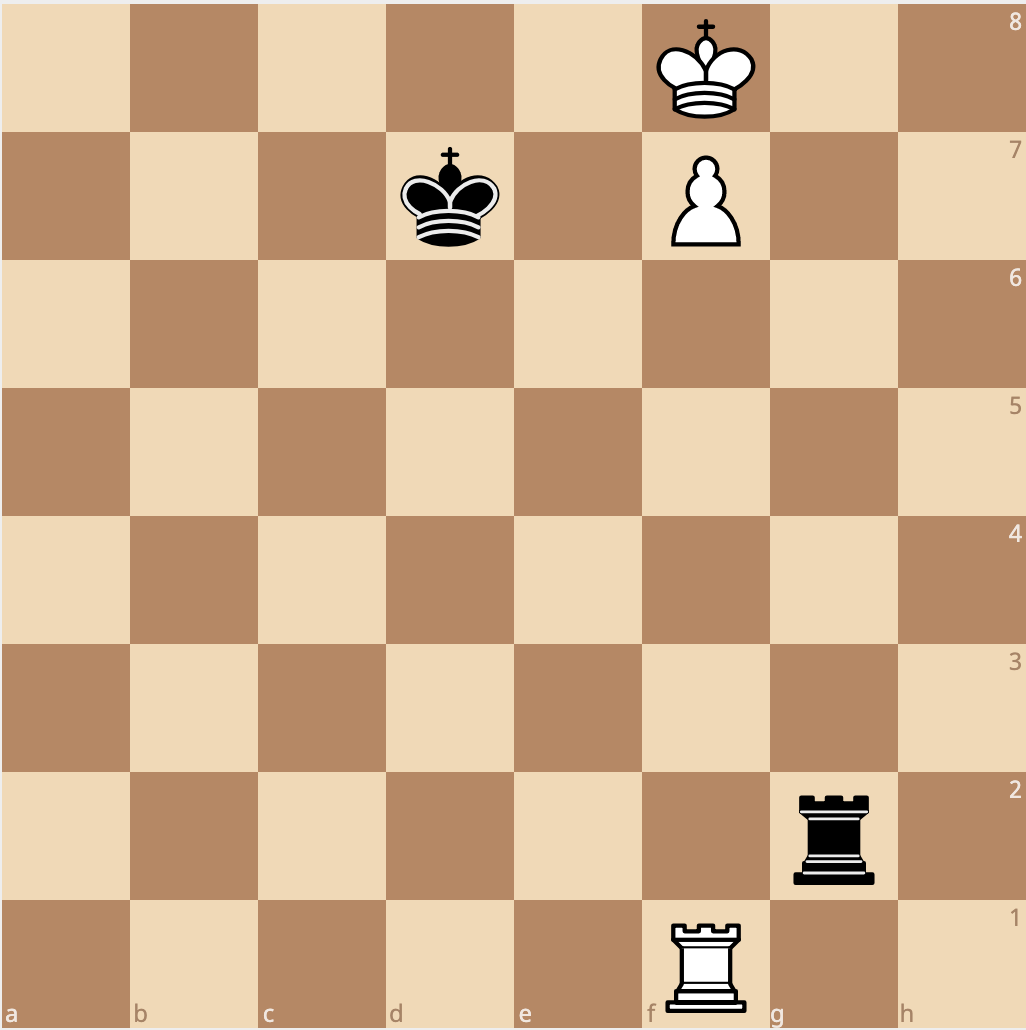
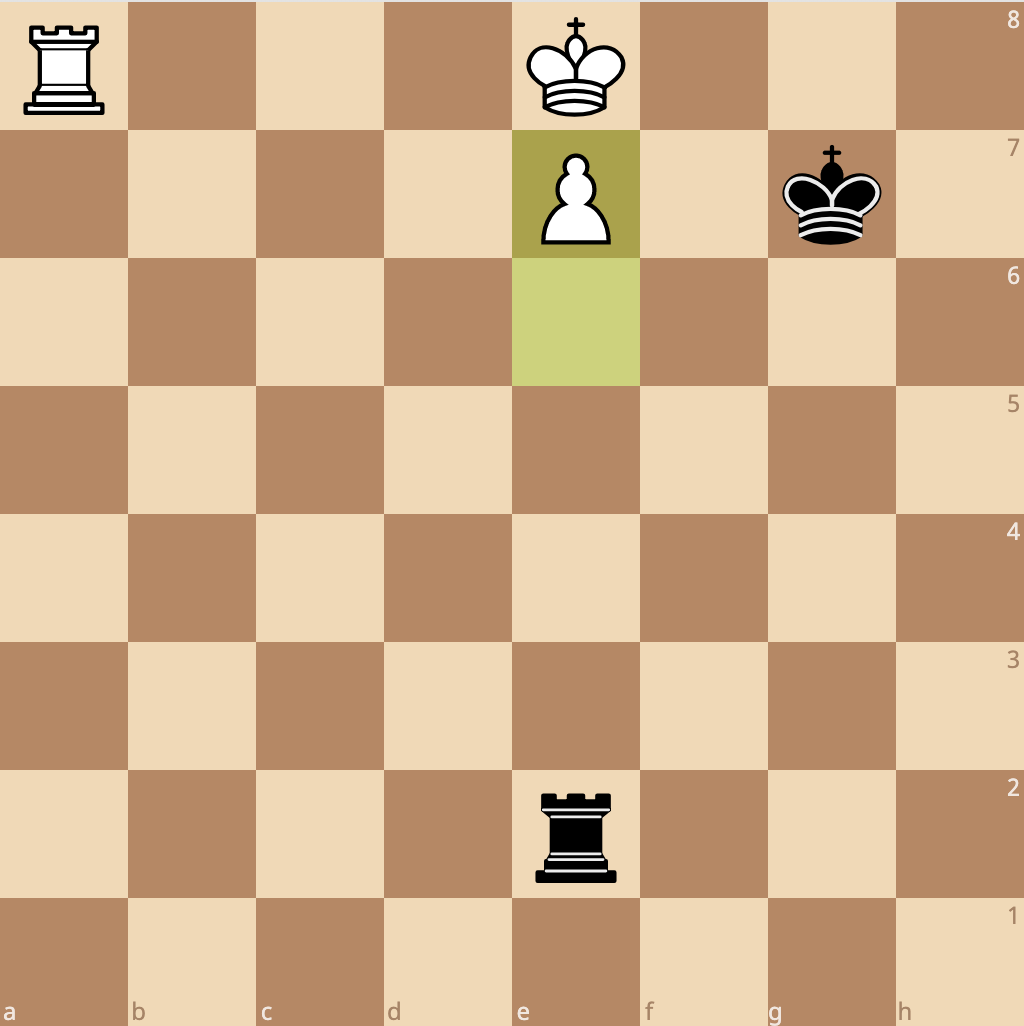
The Lucena position, sometimes called building a bridge, is absolutely a must know rook ending that starts from the following position.
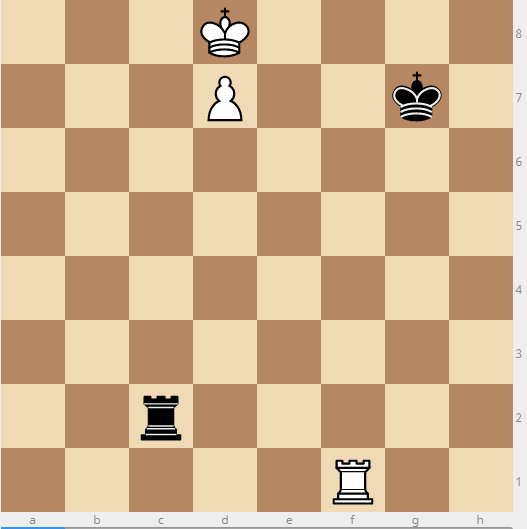
Notice how the white king is in front of the pawn, blocking the pawn from promoting into a queen. If the white king ever comes out along the e file, the black rook will check the king over and over until it goes back in front of the pawn.
If the black rook checks the king and the white king begins zig zagging towards the rook, the king can never move too far from the pawn because it is the only piece protecting it.
[FEN “3K4/3P2k1/8/8/8/8/2r5/5R2 w – -“]
1. Ke7 Re2+ 2. Kd6 Rd2+ 3. Ke6 Re2+ 4. Kd6 Rd2+ 5. Ke7 Re2+ 6. Kd8
Since the king cannot move away from the pawn, this means the first move must be a rook move.
To see where the rook goes, let’s think about the King’s goals.
- The king needs to get away from the queening square
- The king needs to find shelter with help from the rook
Based on this, the next move starts to make sense.
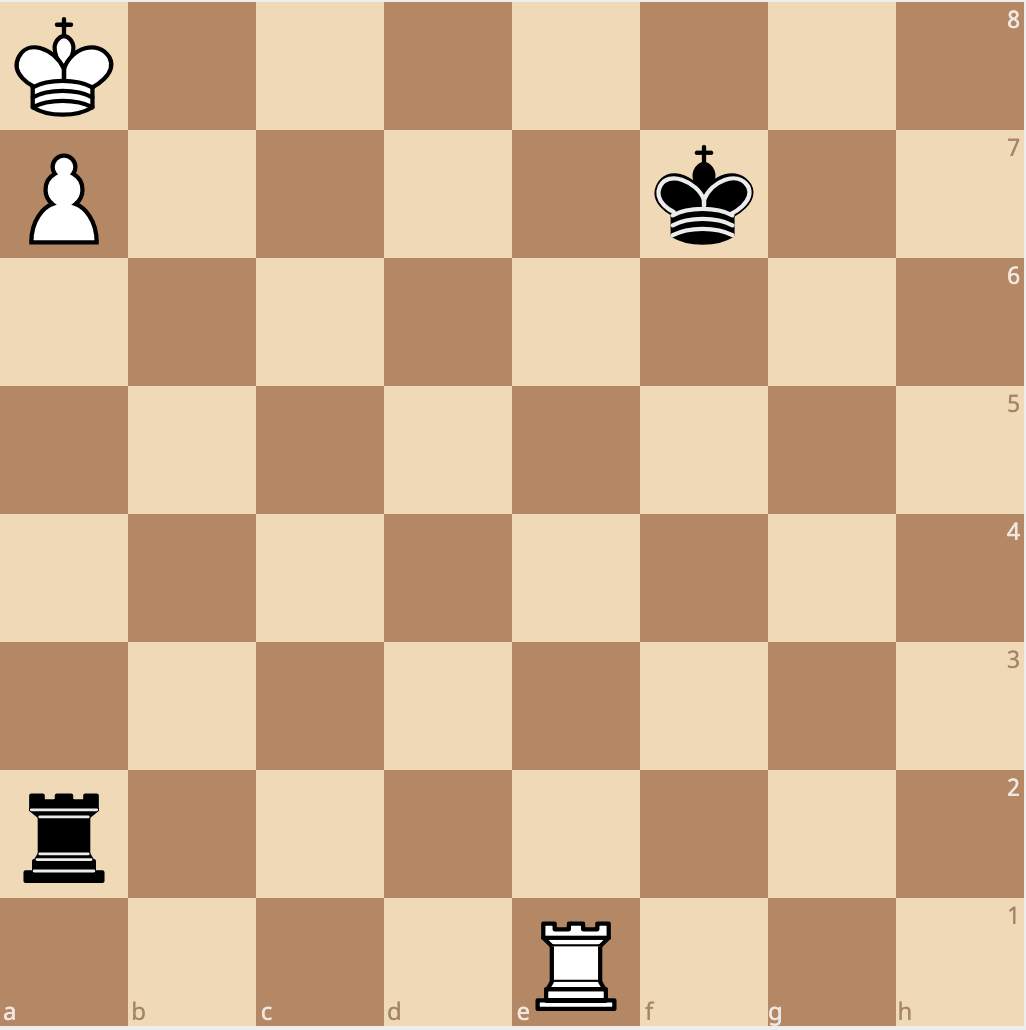
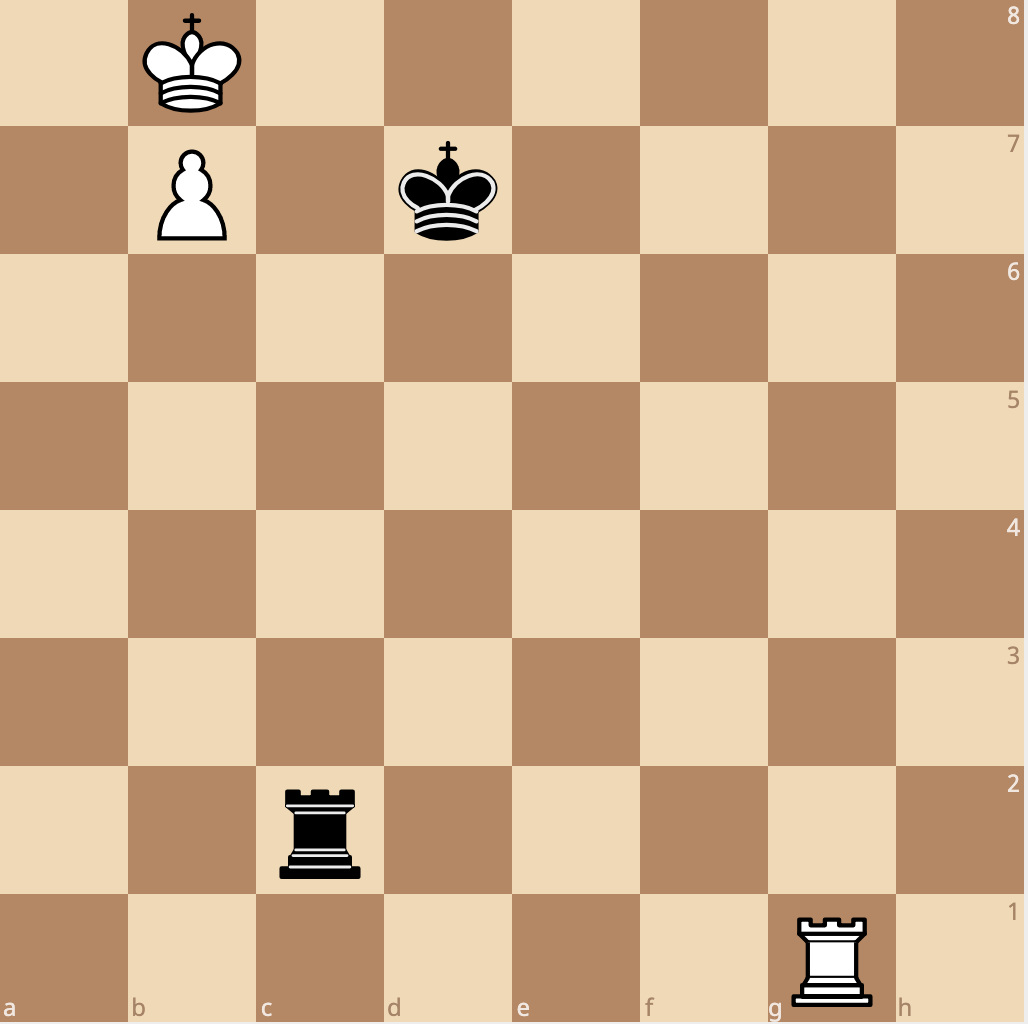
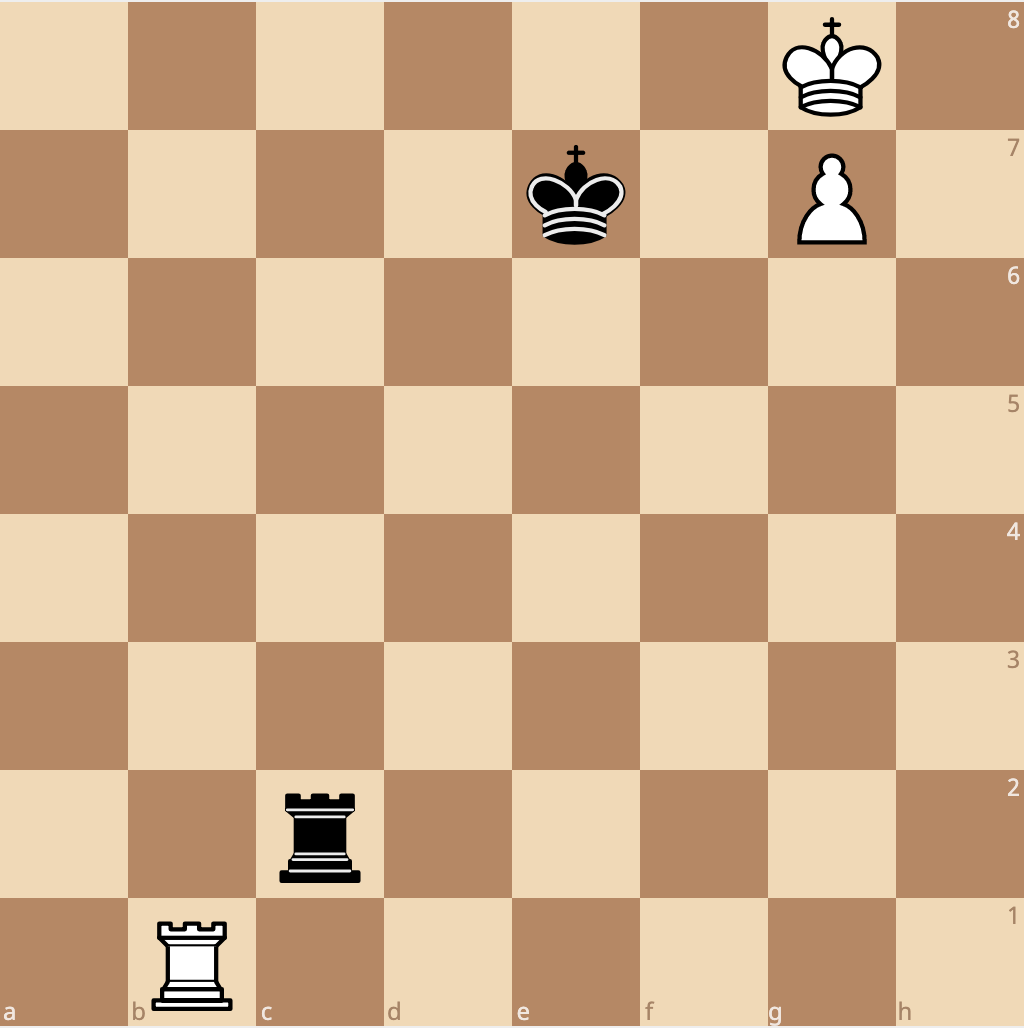
The winning move is 1.Rf4. The key idea in the Lucena position is to remember to bring your rook to the fourth rank.
This rank is where you can build a bridge for your king’s transport to his secondary goal of getting shelter from his rook to prevent is from capturing the pawn.
[FEN “3K4/3P2k1/8/8/8/8/2r5/5R2 w – -“]
1. Rf4 Rc1 2. Ke7 Re1+ 3. Kd6 Rd1+ 4. Ke6 Re1+ 5. Kd5 Rd1+ 6. Rd4
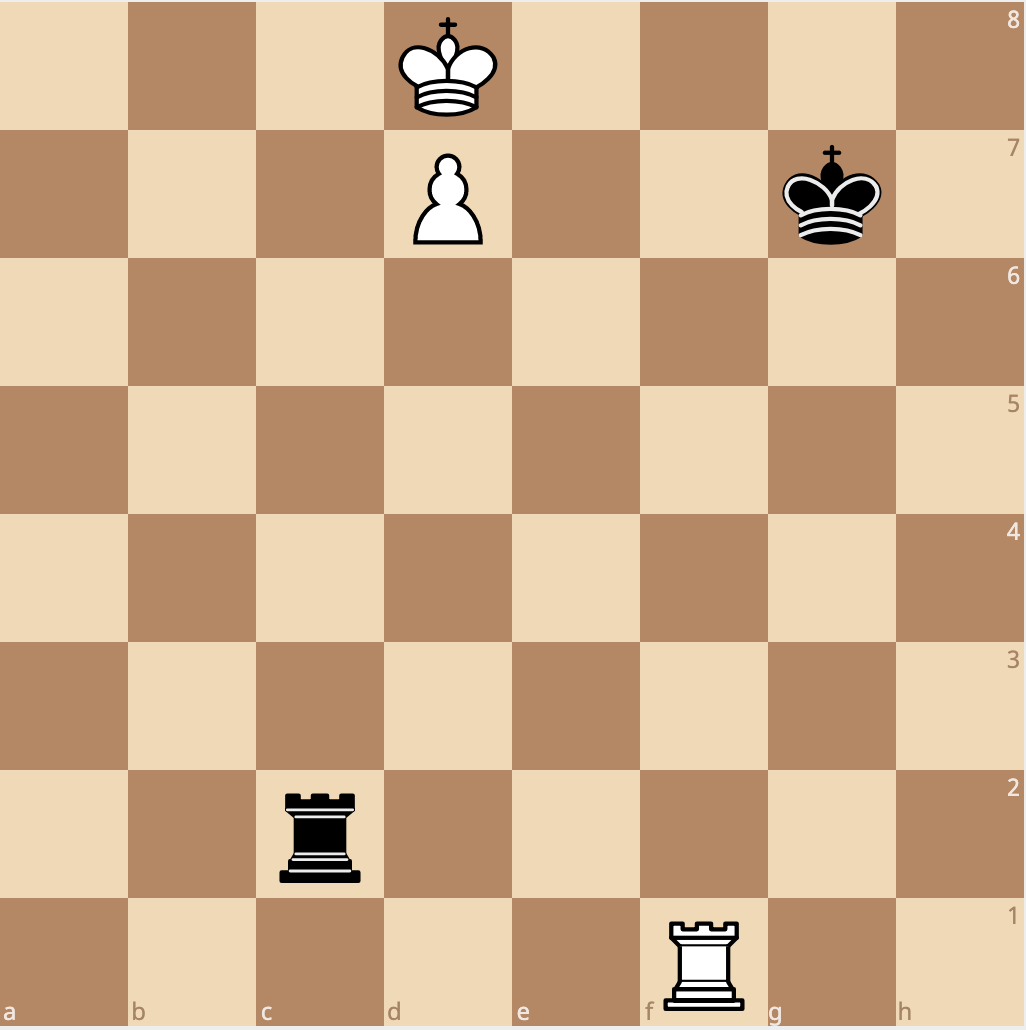
The Lucena will work on any non rook pawn.
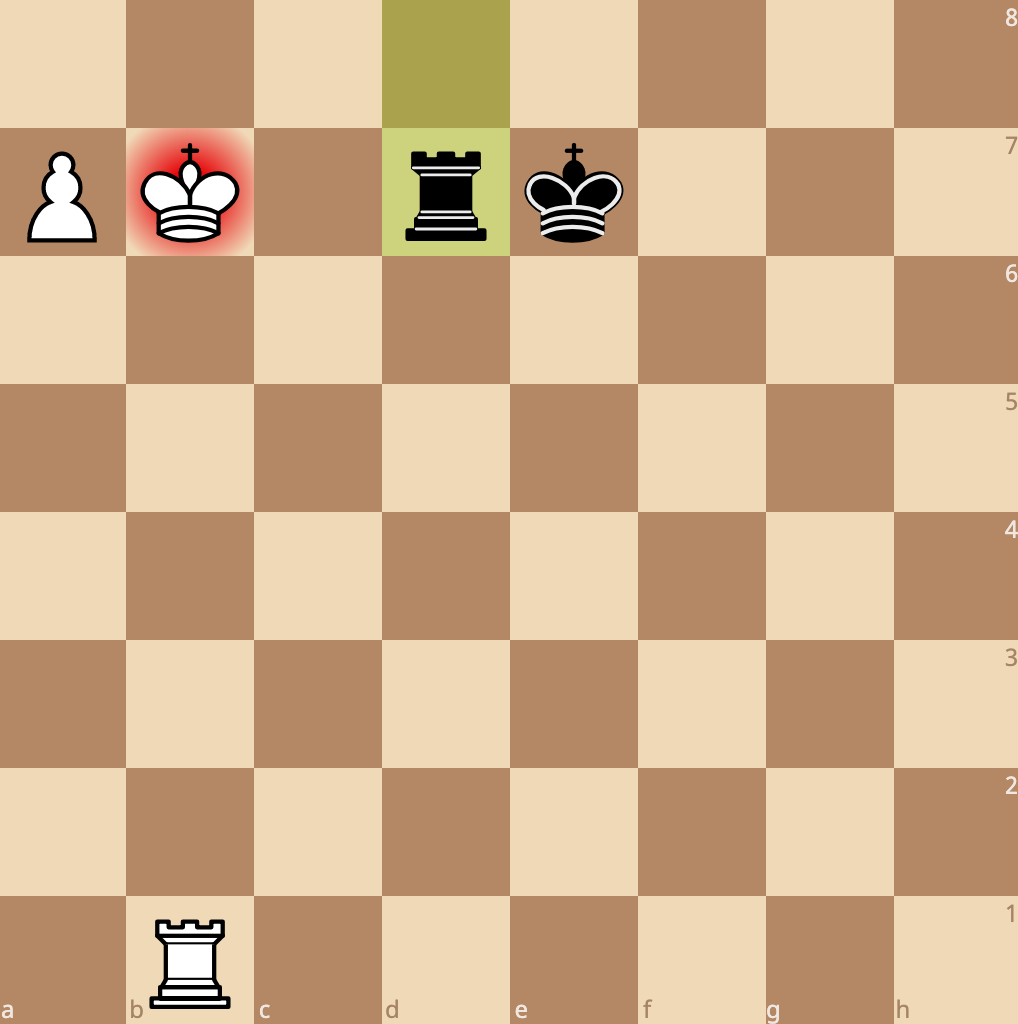
Here’s the Lucena Position one rank over
[FEN “4K3/4P1k1/8/8/8/1r6/8/5R2 w – -“]
1. Rg1+ Kh6
If kf6, Kf8 and the pawn promotes.
2. Rg4 Rc3
Black actually has a few other moves, like Kh4, threatening the rook, but these moves don’t help. Any king moves and white would move the rook behind the passed pawn on the e file, resulting in a win as the pawn is not protected.
3. Kd7 Rd3+ 4. Ke6 Re3+ 5. Kf6 Rf3+ 6. Ke5 Re3+ 7. Re4
And we’ve reached the same position to complete the Lucena.
What about the Lucena on the A or H pawns (Rook Pawns)
In order to win a Lucena position on the A or H files, the opposing king must be cut off by the rook by 3 or more files.
[FEN “K7/P3k3/8/8/8/8/r7/3R4 w – -“]
1. Rb1
This is white’s first move because the goal is to give your king shelter from checks on the B file. Since this is no longer possible, black must check from the side.
This is why white can win with the king cut off three files or more. The black king is essentially out of the game.
1…Rd2 2. Kb8 Rd8+ 3. Kb7 Rd7+
Black checks from the side as long as possible.
4. Ka6 Rd6+ 5. Rb6
This is why the rook originally came to the B file. Black cannot exchange rooks since the king is outside the square.
5…Rd8 6. Rb8 Rd6+ 7. Kb5 Rd5+ 8. Kc4
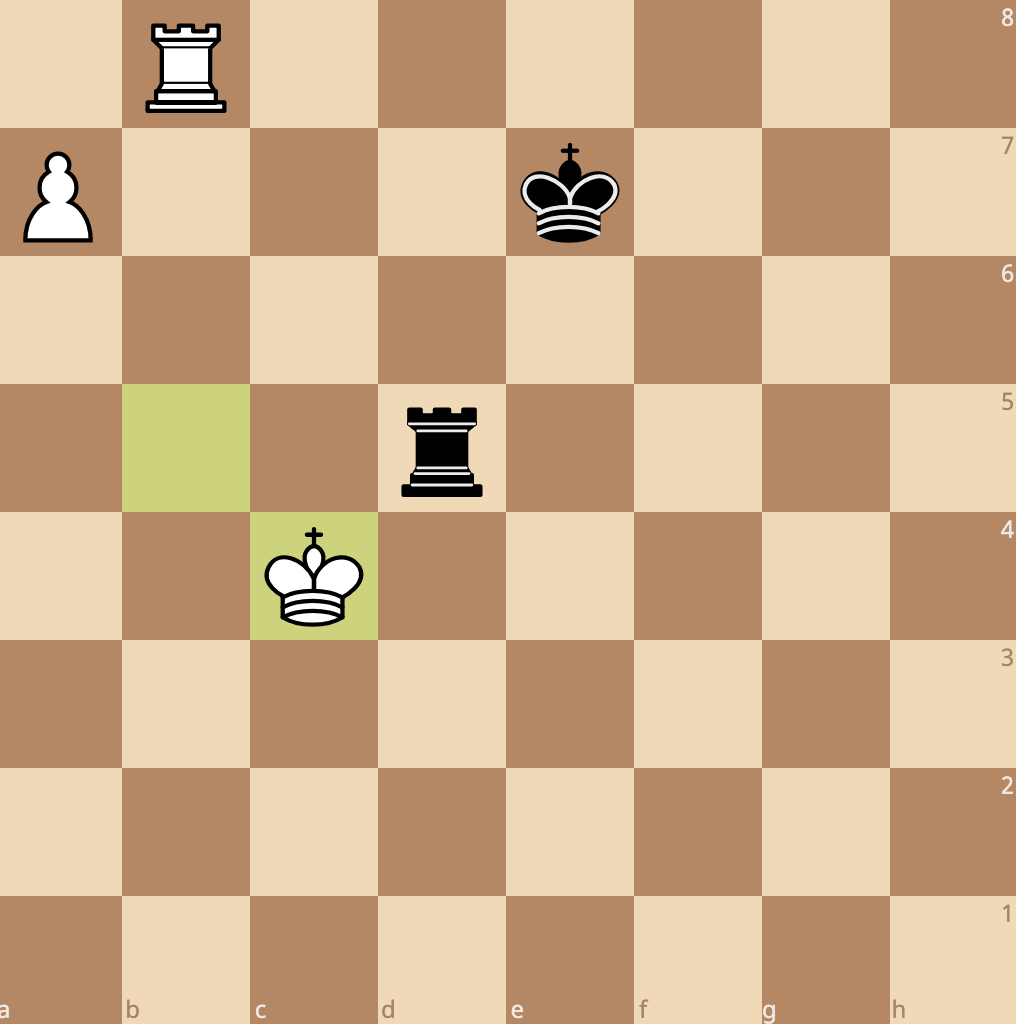
The king is now free to move away from the pawn as the rook controls the queening square.
Often in these types of endgames, if you can swap your king out for the rook protecting the pawn, you can then promote the pawn more easily.
Lucena Practice Postions
The best way to remember the Lucena position is to practice it over and over from various starting positions. I’ve set up the FEN for you so you can play against the computer. Just click each link below and then “play against the machine.” Set Stockfish to level 8 and see if you can win!
A File
H File

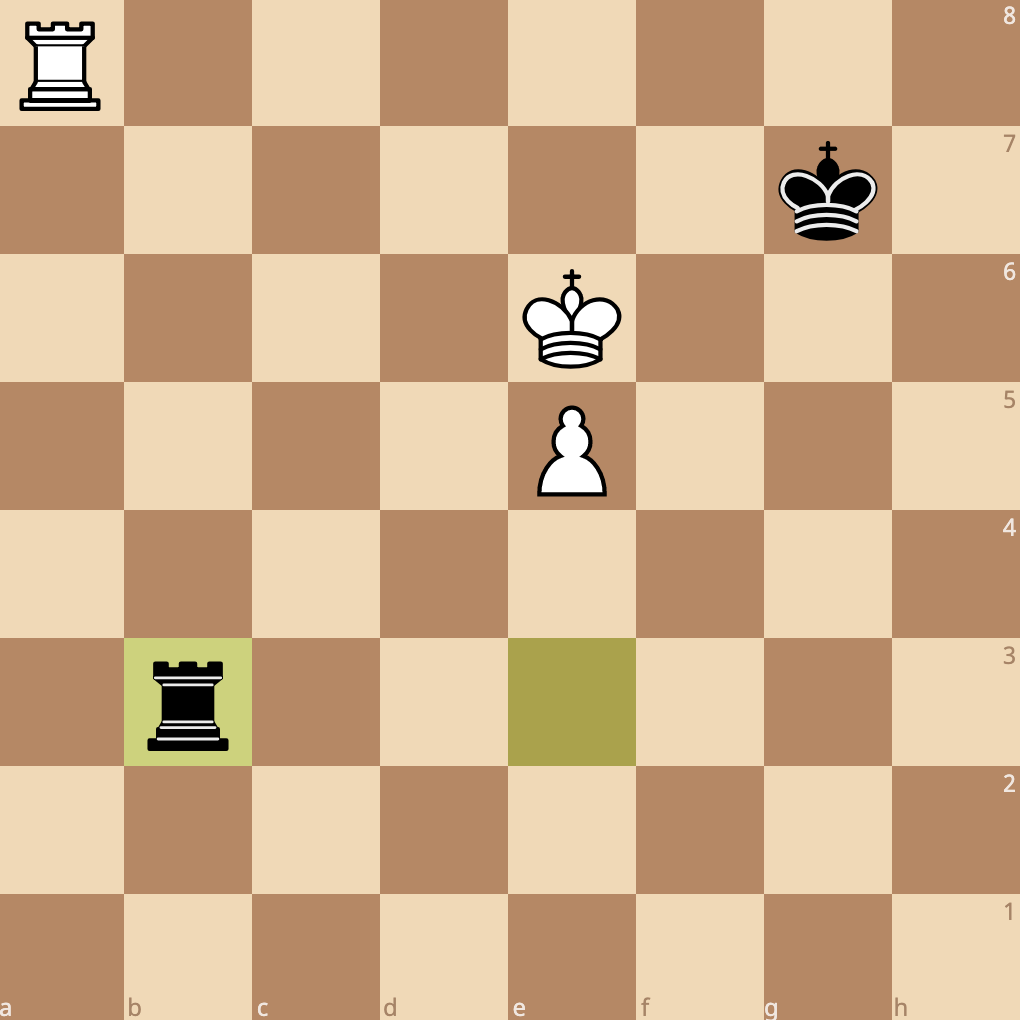
How to Draw the Philidor Rook Ending
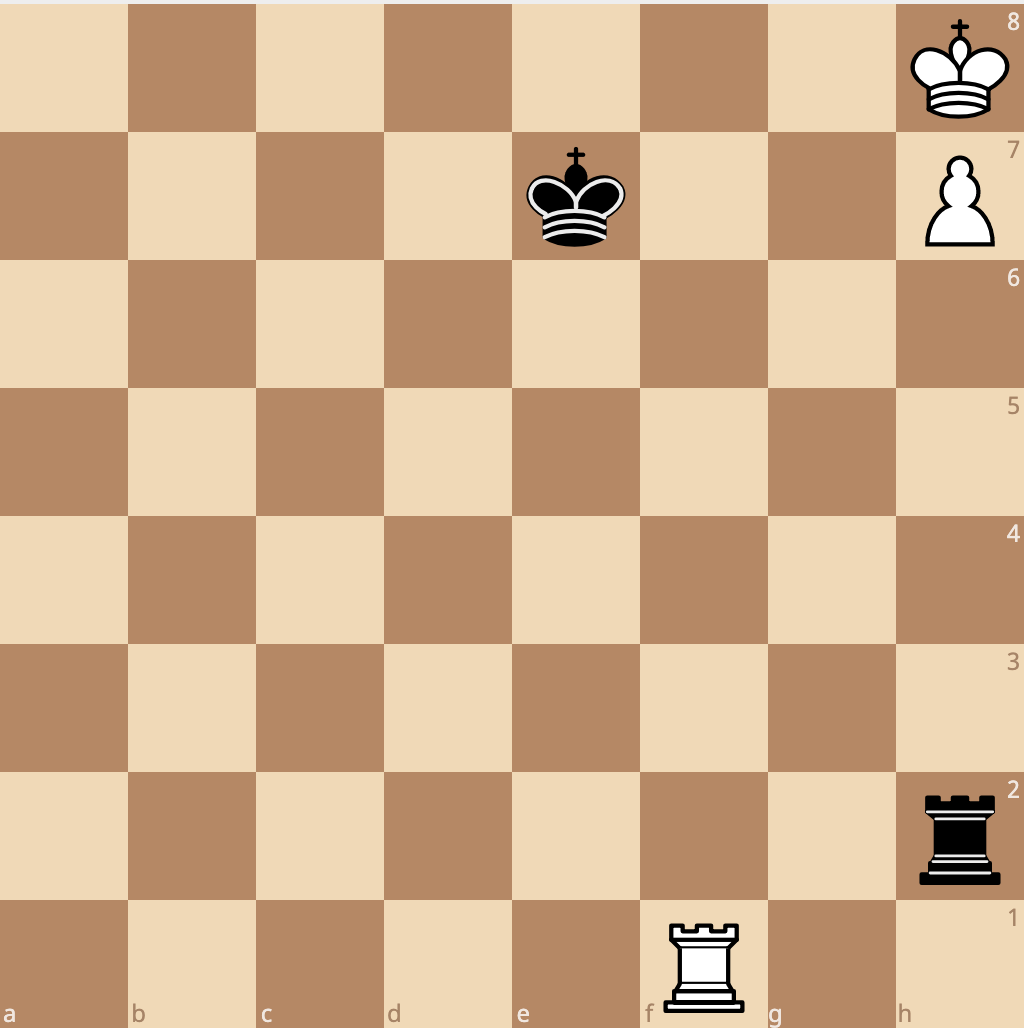
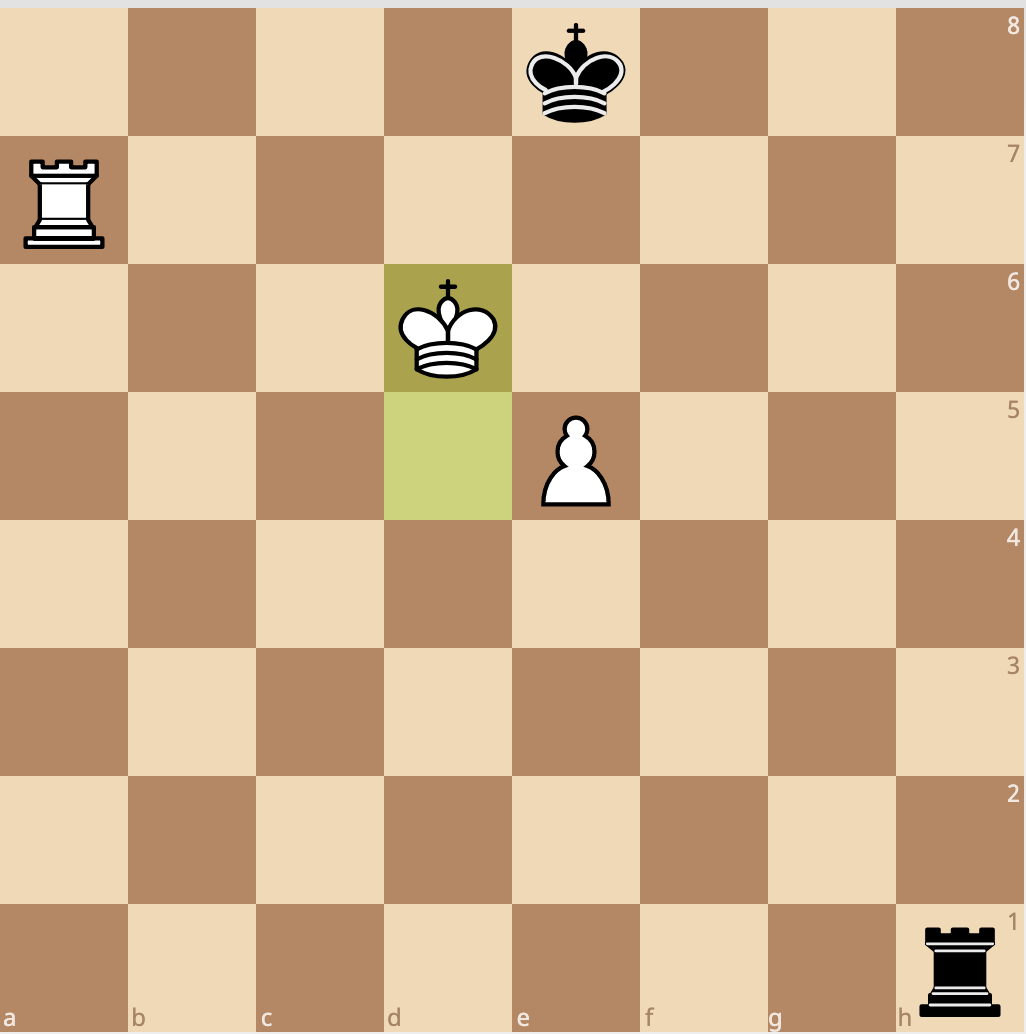
This is the essential Philidor position that you want to get to if you are trying to draw.
The main point here is that you want to get your rook to the third or sixth rank and wait.
Sometimes waiting can be the hardest thing to do in an endgame, but it is often essential to winning or drawing.
Waiting means not trying to make progress, and waiting for your opponent to make a move that makes their position worse. In the case of the Philidor, both sides will wait eternally and it will be a draw.
So how do you wait? You move your rook back and forth along the third or sixth rank. In this scenario, your opponent should do the same.
If the player with the extra pawn ever gets tired of waiting and tries to advance the pawn, the key to a draw is to move the rook to the first rank and check from behind.
Because the pawn will have advanced too far, the king can no longer get shelter.
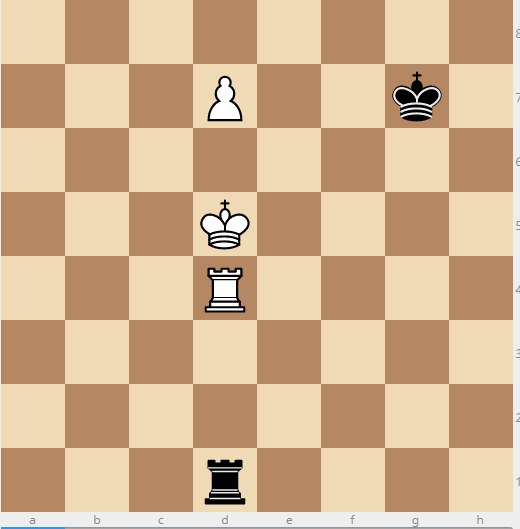
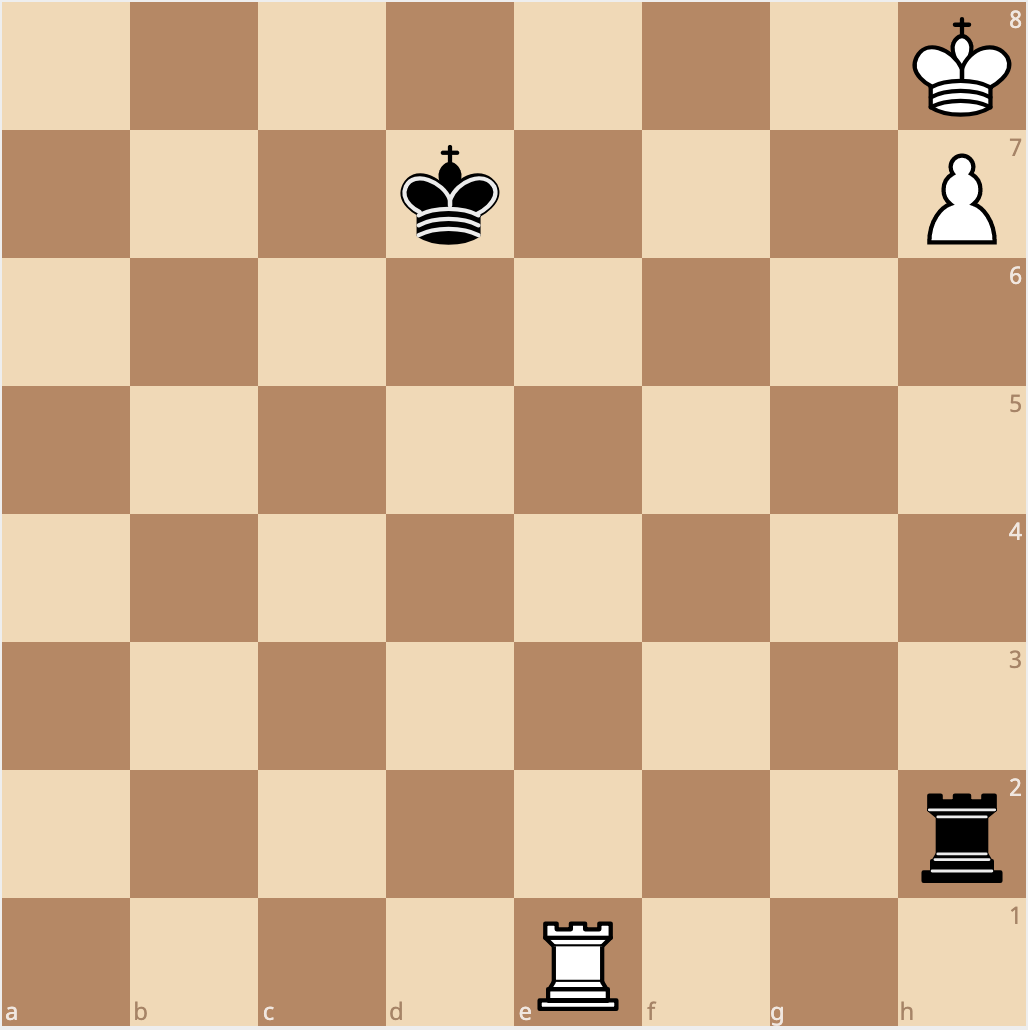
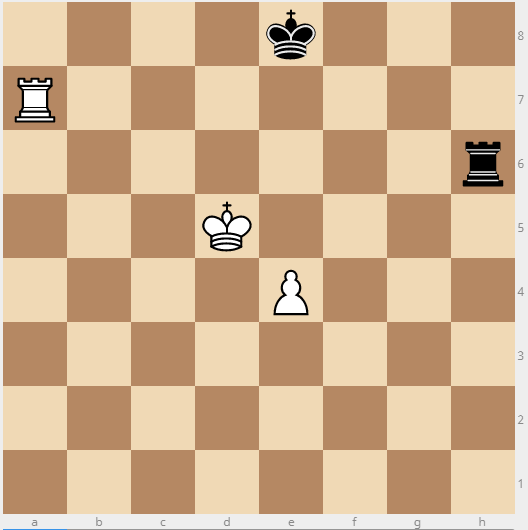
[FEN “4k3/R7/7r/3K4/4P3/8/8/8 w – -“]
1. e5 Rg6 2. e6 Rg1 3. Kd6 Rd1+ 4. Ke5 Re1+ 5. Kd5 Rd1+ 6. Ke5 Re1+
So in the Philidor Position you should always keep these things in mind:
- It is a draw because the rook keeps checking from behind and there is nowhere to hide.
- The white king needs shelter in order to advance the pawn.
- Black bides his time until the pawn is pushed too far and then black retreats the rook to the e file
How to Win the Philidor Position
The original scenario given was a draw. However, there are some positions where the check from behind is not possible forever. This occurs before the pawn is pushed too far.
You may find your opponent unfamiliar with this rook ending, and they don’t patiently wait along the 6th rank. This is where you can gain an advantage and win.
If the king can move in front of the pawn while the rook is unable to check from the side, then the king has found shelter.
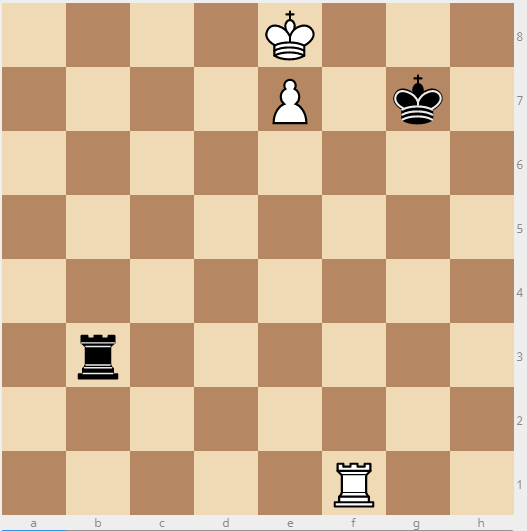
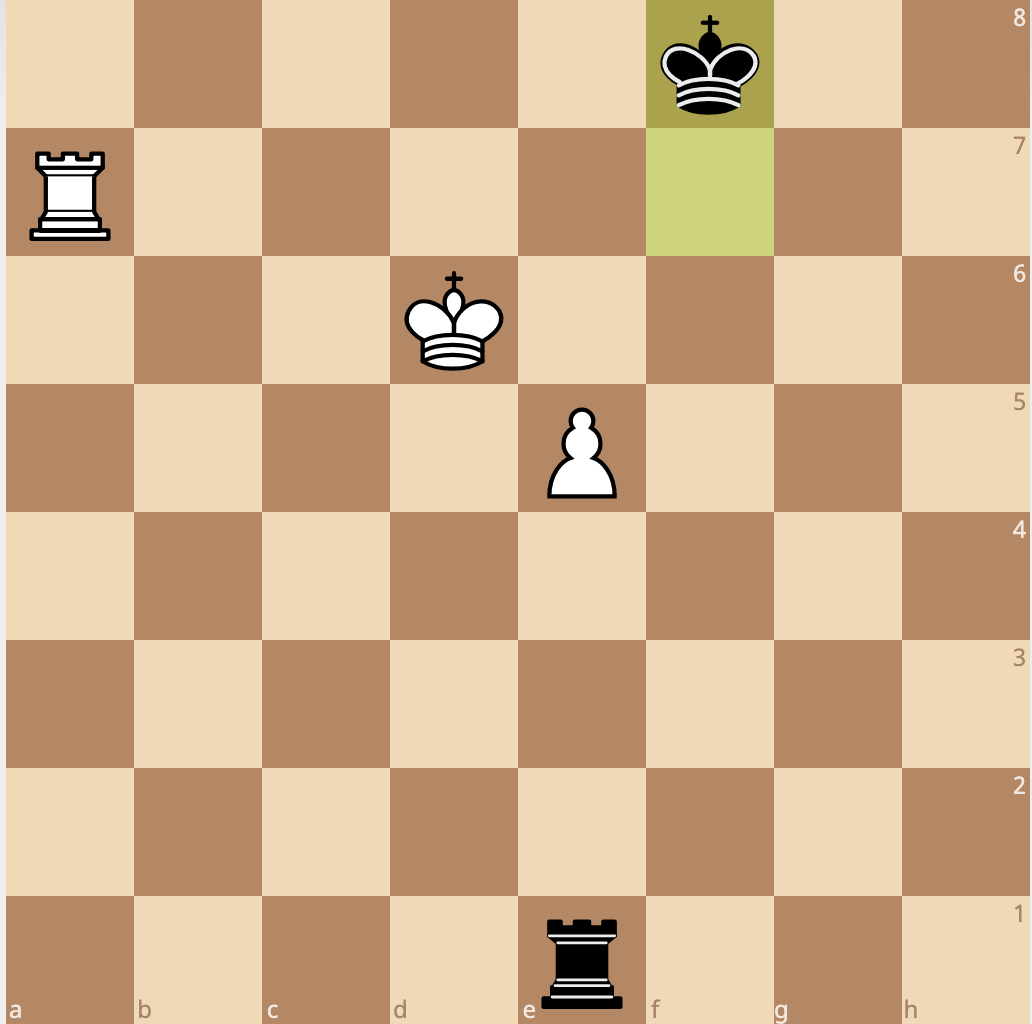
[FEN “4k3/R7/7r/3K4/4P3/8/8/8 w – -“]
1. e5 Rh1??
Black was impatient and did not wait along the 6th rank. White can now make progress with the king.
2. Kd6
It’s important to note the king must go to d6, and not e6. If the king goes to e6, then the rook can still check from the side. However, on d6, the side checks allow the pawn to be pushed to e6.
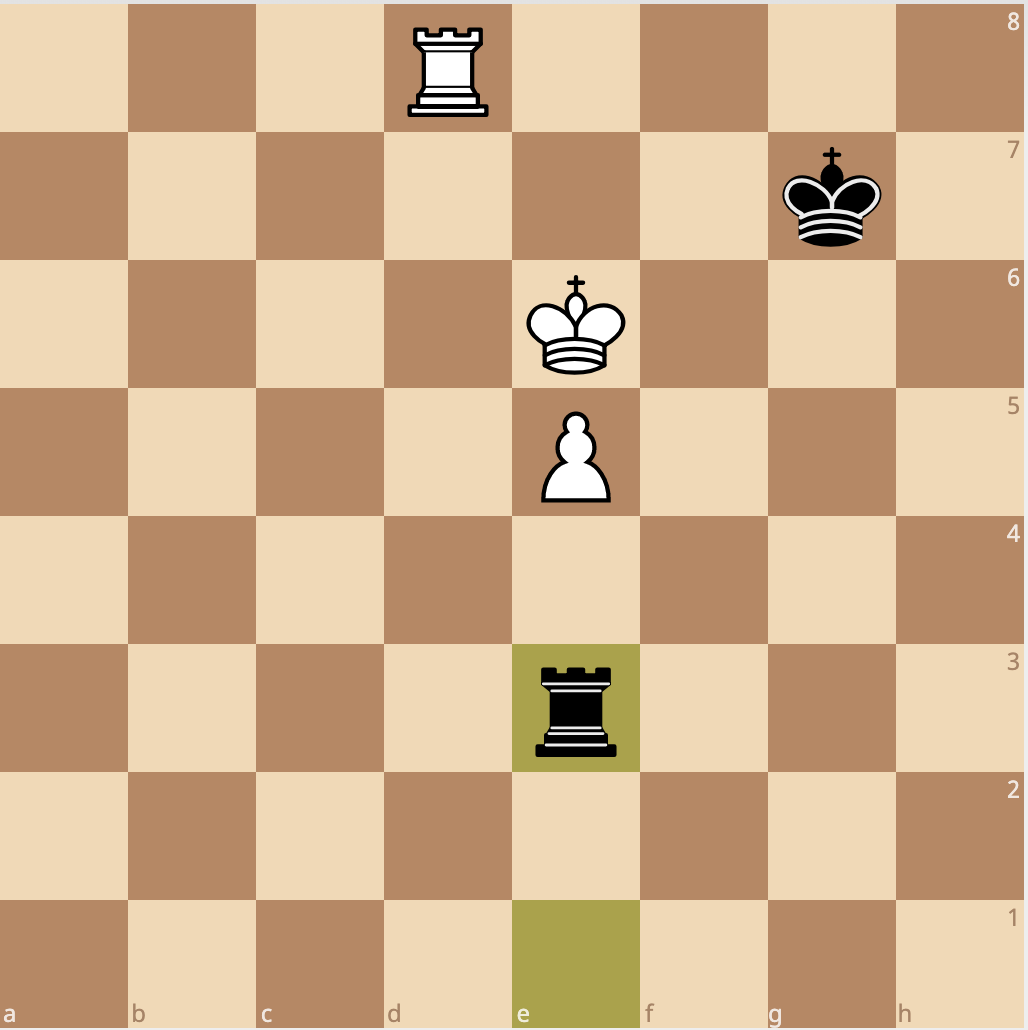
2…Rd1+?? 3. Ke6
Threatening checkmate with Ra8. It will be explained in the next section why Rd1 is a blunder.
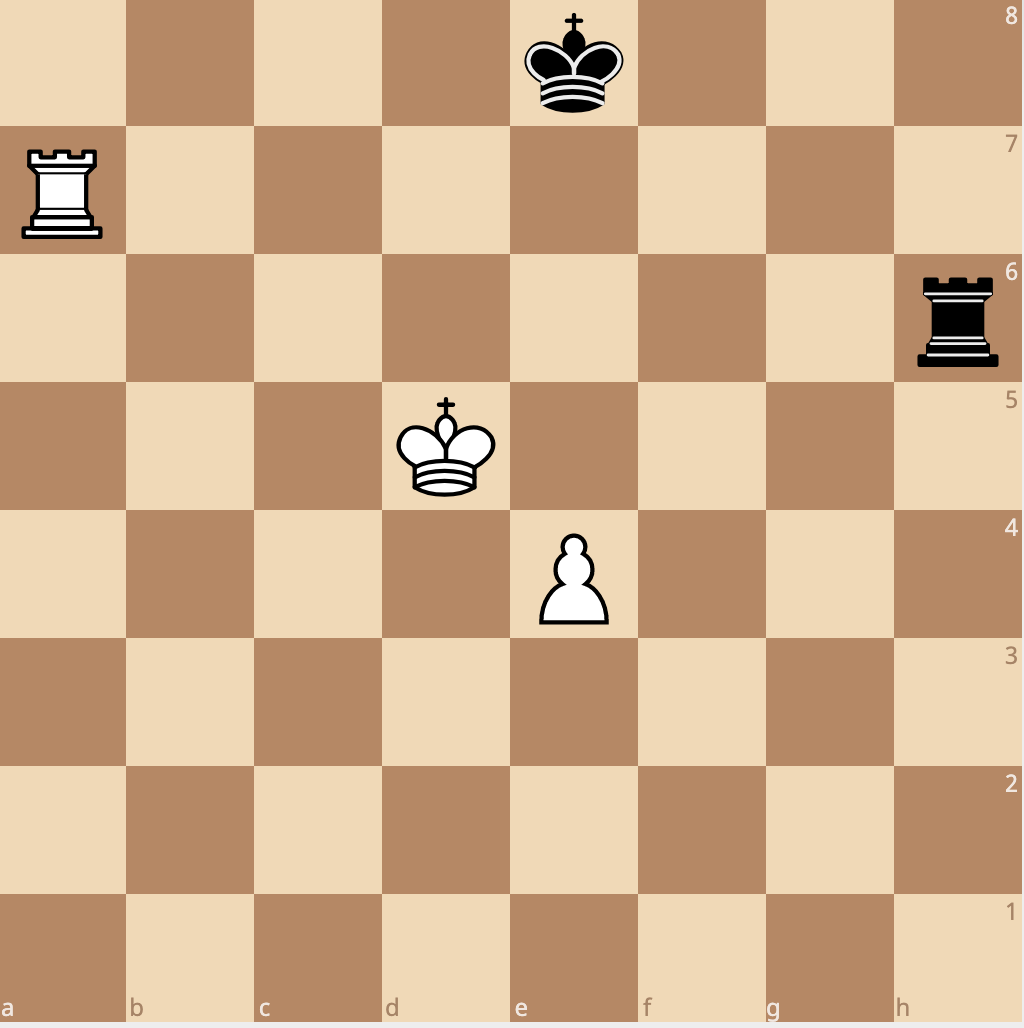
3…Kf8 4. Ra8+ Kg7 5. Ke7 Rd2 6. e6 Re2 7. Kd7 Rd2+ 8. Ke8 Re2 9. E7
Now we have turned the position from a drawn Philidor into a winning Lucena position.
We’ve come full circle to how these two important rook endgames connect. A properly executed Philidor will turn into a win as long as the player fully understands how to win the Lucena. This can only be done if the player does not know how to draw a Philidor position.
What to Do if you Mess Up the Philidor
It’s important to understand the Philidor, but if you mess up and don’t stay on the 6th rank, you can still hold by staying behind the pawn. This technique prevents the player with the advantage from successfully creating a winning Lucena position.
If we return to the blunder from the previous section, we can correct this mistake and save the game. The rook belongs behind the passed pawn on e1.
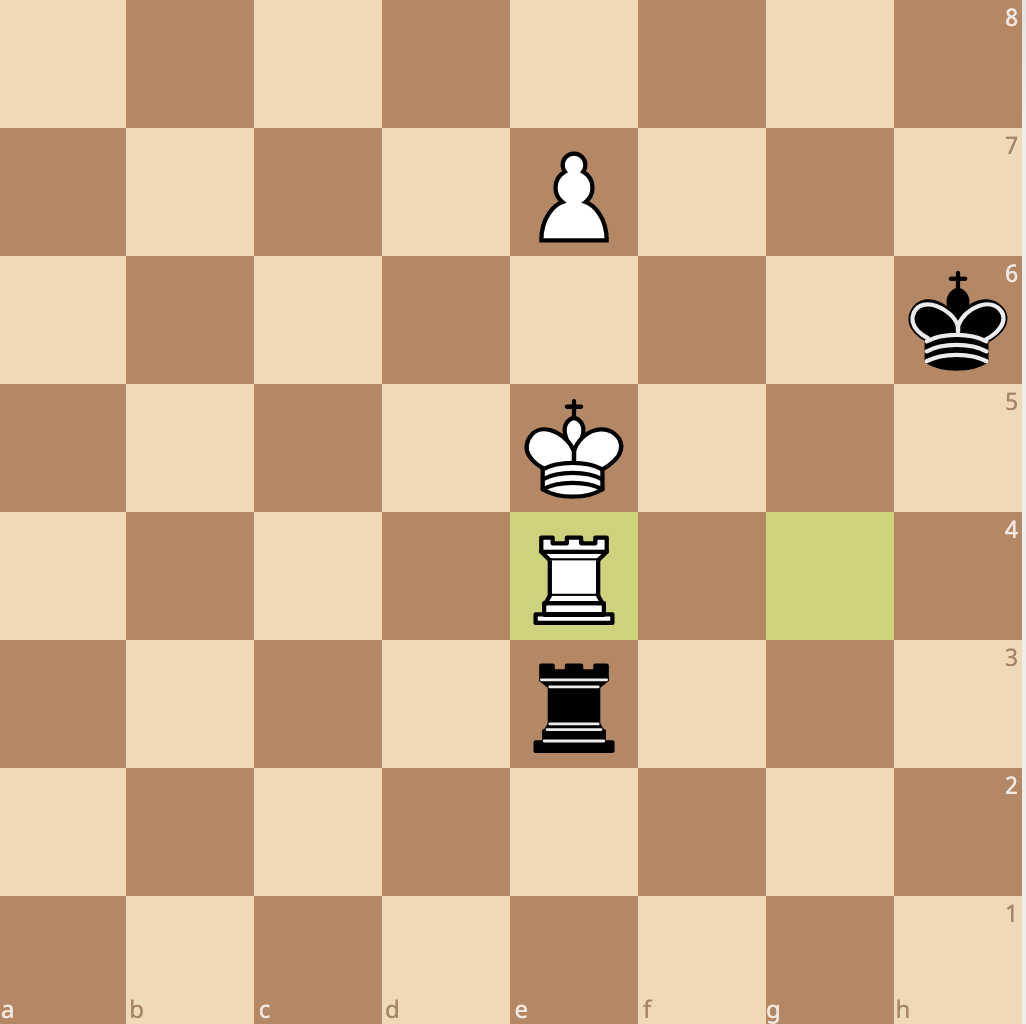
[FEN “4k3/R7/8/3KP3/8/8/8/7r w – -“]
1. Kd6 Re1 2. Ke6 Kf8
Black must watch out for checkmate. While possible to draw moving to either side, the second aspect of the Phildor gone wrong position is to go to the short side. This means the side of the board with less squares between the pawn and the edge of the board.
If you always keep this in mind, you’ll be able to have checks from the side if necessary.
3. Ra8+ Kg7 4. Kd6 Kf7 5. Ra7+ Kf8
Notice how the king always jumps back in front of the pawn when it can to prevent the pawn from being pushed.
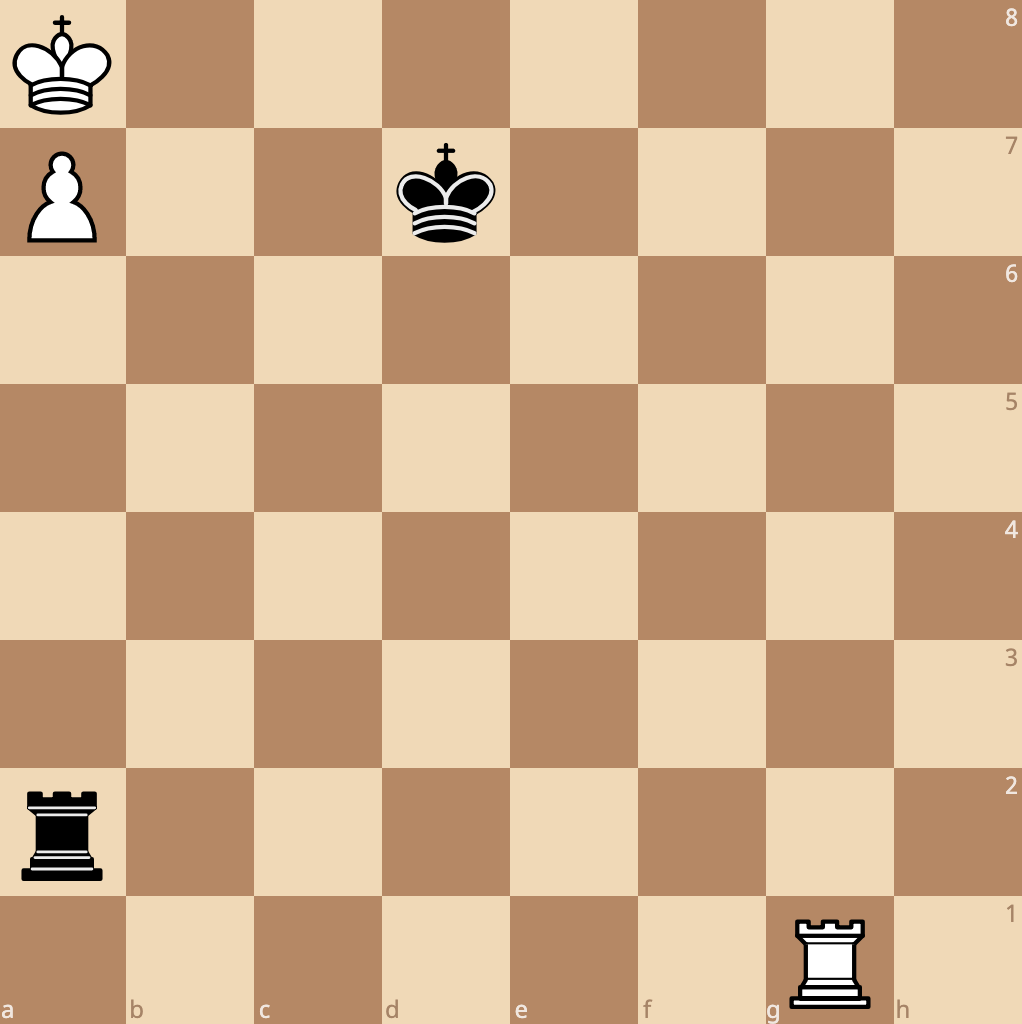
6. Ke6 Re3 7. Ra8+ Kg7 8. Rc8 Re1
The black rook continues to wait just like it did in the original Philidor position.
9. Rd8 Re3 10. Rd1 Kf8 11. Ra1 Kg7 12. Ra8 Rb3
Since the pawn cannot advance with the king in front of it, the rook can also safely check from the side (thanks to the king being on the short side).
Notice how if the rook were on the short side, checking from the side is not possible because the white king can move close to the rook and still protect the pawn.
13. Ra7+ Kf8 14. Ra6 Kg7
And white cannot make progress, so it is a draw.
To recap if you mess up the Philidor, you must:
- Keep your rook behind the passed pawn so it cannot easily be pushed
- Move your king to the short side of the board so you can check from the side with your rook
Next Steps
I hope you learned how to win or draw these famous rook endgames. If you have any feedback, please let me know!
I’ll add in more examples next for you to practice to really hammer these ideas in.